Pumpkin Carving - Master The Jack-O-Lantern

Pumpkin Carving - Master The Jack-O-Lantern
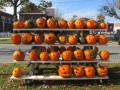
Halloween is a crazy, spooky time for all goblins to come out and shine. Get your scare on and carve a Jack-O-Lantern with a few tools around the house, a simple template, and a nice-healthy looking pumpkin, of course. When little trick-or-treaters come around, your Jack-O-Lantern will get ooh's and ahh's from little tikes and parents alike.
Pumpkins are also great to keep around for Thanksgiving. Everything fall-like comes out this time of year including the autumn leaves, the Thanksgiving tablecloth, the extra leaf in the dining room table to hold all the visiting family and friends that gather. What a great time of year. I love the holidays. Don't forget your holiday pumpkin. Use a simple template of a happy pumpkin or better yet, create a turkey carving on your pumpkin and proudly dislay it next to the cornucopia or indian corn or fall leaves that are part of the centerpiece on your Thanksgiving table.
Pumpkin Poker and Saw Kit

Jack is waiting.
The steps to carving out a pumpkin are not that difficult. You have probably carved a nice scary looking Jack-O-Lantern in the past. Here are a few secrets to help you in becoming a master carver. These few tid-bits on the proper way to cut, handle, and extend the life of your carved pumpkin will allow you to take full advantage of the Halloween season fun. Get the kids involved and let them help with a few of the steps.
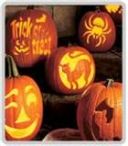
Detailed Pumpkin Carving -The Jay-O-Lantern


Carving a Pumpkin
Tools and Other Fun Stuff
You will need:
1) A pumpkin
2) A good boning knife.
3) An icecream scoop.
4) A small saw.
5) Petroleum jelly.
6) Cinnamon

Carving a Pumpkin - Master the Technique
Step 1:
Choose a pumpkin that looks healthy.
The pumpkin should have no bruises.
The stem should be sturdy.
The bottom should be relatively flat so it will show your work and stand level.
Tips for the Top
Step 2:
Cut the top of the pumpkin to make a lid.
Cut at an angle so the top won't fall into the pumpkin when you're done.
Use the boning knife.

Pumpkin Pulp
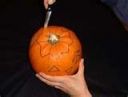
Step 3:
Take off the lid and scoop out the pulp inside.
Use an ice-cream scoop or a claw that you can purchase as part of a carving set.
Thin the inner wall of the face or front area to about an inch thick, making it easier to make the face.
Clean Carving
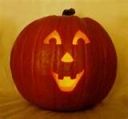
Step 4:
Carve out the face.
Use a small saw to make the details of whatever design you choose.
There are many templates available or you can make your own.
Hold the pumpkin in your lap with the face looking up at you.
Depending on the look you are trying to achieve, try to cut straight through and not at an angle unless the template calls for it.

The Icing on the err...Pumpkin
Long Live Jack
Final Steps:
Once you have finished carving out the design on your pumpkin, use petroleum jelly where the cuts were made to seal in the moisture.
If your carved pumpkin starts to shrivel up after a few days, soak it face down in cold water for a few hours to bring it back to life.
If you like to leave the top on while the candle is lit, make a small hole in the top to release the heat. Place the lid on the pumpkin with the candle lit. Lift up the lid to see where it has blackened, then cut a small hole at that spot.
Here's one more trick (or maybe it's a treat).
Sprinkle the inside of the lid with cinnamon. When you light up the jack-o-lantern, it will smell like pumpkin pie.
Halloween Disney Pumpkin Carving Kit

Pumpkin Carving Video
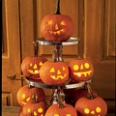
Extreme Pumpkins II

Extreme Pumpkins
I went on to this guys website and there are a lot of cool things going on. You can view last year's 2007 Halloween Extreme Pumpkin Contest Winner's cool looking pumkin ideas. There are some neat ideas Extreme Pumpkins Contest Ideas. You can order the book and keep it as a resource for making extremely intricate and cool looking carved pumpkins. Amazon has it for a great price.
Pumpkin Carving Necessities

Pumpkin Carving Kit - Basic steps to use the tools in this kit.
Amazon.com Product Description
Even the least artistic among us can have the coolest jack-o'-lanterns in the neighborhood this year with Dremel's pumpkin- carving kit. It's a neat, buzzy little unit that carves off layers of pumpkin flesh to let the light glow through. It isn't meant to cut all the way through the pumpkin, and the effect is perfectly spooky. Powered by four AA batteries, it's got two speeds for superior pumpkin-stock removal, 6,000 and 12,000 rpm, so it's not a child's toy.
Follow the steps above to carve out the top and clear out the pulp.
Next :
Turn the tool on low and begin tracing the areas to be removed.
You can use the high setting for large area material removal. The key is to remove approximately the same amount of material on your whole pumpkin to achieve a uniform depth.
Then:
Once you've finished, remove the paper template, place a light source, such as a candle, in the pumpkin, dim the lights, and see how well the light shines through your carving.
If you want more light to shine through, turn the lights back on, remove the candle and remove additional material from your pumpkin.
Printable Templates are available from Dremel